Check it out! Isn't this dish just a feast for the eyes? Believe it or not, I found the basic recipe in the quarterly magazine of our heath insurer! Good for them, good job!
I tried it and found it was 'missing' something. So I added a couple of things, I left out a couple of things, and here it is! All pimped up and ready to become your favourite 'make-ahead' recipe!
Enjoy!
Ingredients
(for 4 persons)
•tiny piece of ginger root (approx. 2 cm), rasped
•2 spring onions, sliced in thin rings
•1 red chili pepper (no seeds, chopped)
•4 pieces of white fish (approx.200 g each)
•toothpicks
•4 banana leaves
•1 tbs tamari sauce
•1 tsp of lemon zest
•1 tsp of sesame oil
•2 tsps of virgin olive oil
What you do
•preheat the oven to 175°C
•mix all the ingredients in a bowl keeping fish and banana leaves to the side
•now place each piece of fish in the middle of a banana leave and scoop 1/4 of the mixture on top of the fish
•close the banana leave using toothpicks
•place all the packages in a oven proof fish
•cook for aprox 30 min.
Notes
If you can find big enough banana leaves where you live, it is best to be able to close the leave entirely, making a little package :-D
Green Thirst Quencher
Living where we live (Western Europe), drinking (a lot of) alcohol is 'normal'. Actually if you don't join in, people ask you what is wrong with you, if you are on a strict diet or are taking medicine.
It is so 'main stream' that none of us even think 'we' drink a lot. But most of us do, I know that for a fact.
So what is a lot, right? 'A lot' is different for everybody. But if you wake up feeling even a light headache, with less energy than usual, your stomach is maybe a bit upset and your intestines inflamed ... In my book, that sounds like your body is at least a bit intoxicated...
I can feel like that after even after 2 glasses of wine.. Yep, I am a light weight.
Putting up a fight against drinking social pressure is very difficult, I know. Specially in countries where when you go out, the only alternative to having an alcoholic drink is having Coca-Cola or Sprite!
So if you decide to drink less or not to drink alcohol at all (for a while or for ever) it could be difficult at first. So you need to arm yourself with some creativity. Here is a concoction that will pamper your body and I can guarantee your 'alcoholic drinking' buddies will want to have, when they see you having it!
Ingredients
•1/3 pineapple juice, 1/3 coconut water, 1/3 (sparkling) mineral water
•1 thin slice of lime
•1 fresh mint twig
•crushed ice
Note
Use organic produce. Your body will thank you for it, eventually :-D
It is so 'main stream' that none of us even think 'we' drink a lot. But most of us do, I know that for a fact.
So what is a lot, right? 'A lot' is different for everybody. But if you wake up feeling even a light headache, with less energy than usual, your stomach is maybe a bit upset and your intestines inflamed ... In my book, that sounds like your body is at least a bit intoxicated...
I can feel like that after even after 2 glasses of wine.. Yep, I am a light weight.
Putting up a fight against drinking social pressure is very difficult, I know. Specially in countries where when you go out, the only alternative to having an alcoholic drink is having Coca-Cola or Sprite!
So if you decide to drink less or not to drink alcohol at all (for a while or for ever) it could be difficult at first. So you need to arm yourself with some creativity. Here is a concoction that will pamper your body and I can guarantee your 'alcoholic drinking' buddies will want to have, when they see you having it!
Ingredients
•1/3 pineapple juice, 1/3 coconut water, 1/3 (sparkling) mineral water
•1 thin slice of lime
•1 fresh mint twig
•crushed ice
Note
Use organic produce. Your body will thank you for it, eventually :-D
Tomato and Pomegranate Salad
When I first started collecting my recipes, notes and findings under Cornucopia -I don't really consider myself a 'blogger' but rather a 'researcher'- I truly thought that what I was sharing was incredibly useful. The information was out there (I had found it), but lay hidden and was seen as 'alternative'.
Lots has changed since then and 'healthiness' had become a very big business. This is not all bad. We are all far better informed and more conscious about what we eat and what it does to our body and overall health.
Established chefs with big names and high end restaurants have changed their beat, paying heed to popular demand. Others like Yotam Ottolenghi had a mayor break through, just because we wanted 'pureness' and began to frown at 'processed'.
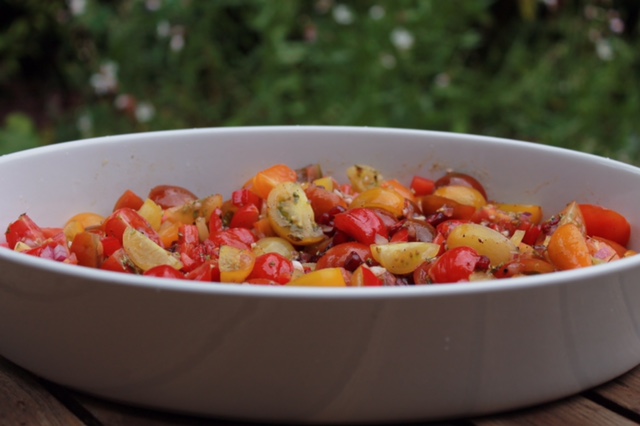
So here is one of my favourite Yotam Ottolenghi's salad. I am adding it to Cornucopia, because it belongs to my collection of 'culinary gems'. It is one of those recipes I like to prepare over and over again. Hopefully you will love it as much as I do and will help you out if you are looking for guilt-free inspiration...
Ingredients
(for 4 persons/side dish)
•600g of multi coloured (cherry) tomatoes, diced
•1 (medium) red onion, chopped
•1 (medium) red pepper, diced
•2 garlic cloves, crushed
•1/2 tsp ground allspice
•2 tsp white wine/cider vinegar
•1 1/2 tbsp pomegranate molasses
•60 ml virgin olive oil
•seeds of 1 medium pomegranate (170 g)
•1 tbsp fresh oregano leaves or 1 tsp of dry oregano leaves
What you do
•arrange the tomatoes, with the onion, pomegranate and red pepper in a (flat) salad bowl
•whisk the garlic, allspice, vinegar, molasses and oil into a vinaigrette
•pour the vinaigrette over the vegetables and now sprinkle the oregano over it.
Lots has changed since then and 'healthiness' had become a very big business. This is not all bad. We are all far better informed and more conscious about what we eat and what it does to our body and overall health.
Established chefs with big names and high end restaurants have changed their beat, paying heed to popular demand. Others like Yotam Ottolenghi had a mayor break through, just because we wanted 'pureness' and began to frown at 'processed'.
So here is one of my favourite Yotam Ottolenghi's salad. I am adding it to Cornucopia, because it belongs to my collection of 'culinary gems'. It is one of those recipes I like to prepare over and over again. Hopefully you will love it as much as I do and will help you out if you are looking for guilt-free inspiration...
Ingredients
(for 4 persons/side dish)
•600g of multi coloured (cherry) tomatoes, diced
•1 (medium) red onion, chopped
•1 (medium) red pepper, diced
•2 garlic cloves, crushed
•1/2 tsp ground allspice
•2 tsp white wine/cider vinegar
•1 1/2 tbsp pomegranate molasses
•60 ml virgin olive oil
•seeds of 1 medium pomegranate (170 g)
•1 tbsp fresh oregano leaves or 1 tsp of dry oregano leaves
What you do
•arrange the tomatoes, with the onion, pomegranate and red pepper in a (flat) salad bowl
•whisk the garlic, allspice, vinegar, molasses and oil into a vinaigrette
•pour the vinaigrette over the vegetables and now sprinkle the oregano over it.
Red Cabbage Salad Caleidoscope
I am a sucker for cooking TV programmes. Specially around Christmas time. Mostly, I get a bit irritated about how unhealthy all the presented recipes are. But I am always curious to learn something new and to find out what the latest 'trend' is. This past season, it was all about 'how simple and fast' it is to prepare a Christmas meal.
Nigella is usually not much better that most of the over sized chefs I see on TV. Except this Christmas she did show us a fresh and healthy red cabbage salad that I pinned down. I love red cabbage but I feel I am always short of original ideas on how to incorporate it.
I tried this particular recipe different times since the beginning of December and...it's a keeper!
I have one comment I would like to add -for those whom also watched the BBC programme: in the programme, Nigella says it is one the salads one can prepare a couple of hours in advance, and still keep it's crispyness... Well, yes indeed, although there is a but. You can prepare it even a day in advance, if you would want to, provided you mix the vegetables but add the dressing at the very last minute...
Ingredients
(good for a side dish for 10)
•half a red cabbage, thinly sliced;
•4 big or 6 small spring onions (trimmed and sliced in 4 cm long batons);
•2 red peppers (seeds and membranes removed; sliced in thin 4 cm long strips);
•1 yellow pepper (seeds and membranes removed; sliced in thin 4 cm long strips);
•1 orange pepper (seeds and membranes removed; sliced in thin 4 cm long strips);
•1 red chili pepper (seeds and membranes removed; diced);
•100 g fresh coriander leaves;
•juice of 2 limes (zest and juice of one; juice of half het second one);
•250 ml pineapple juice (fresh, no additives please!);
•1 1/2 tbsp Himalayan salt (crushed);
•2 tsp sesame oil;
•2 tsp maple syrup (honey or agave are good alternatives);
What you do
•toss all vegetables (except the chili pepper and coriander leaves) in a large bowl;
•mix all the remaining ingredients in a small bowl;
•a little while before serving (30 min.) add the dressing and coriander leaves to the vegetables and mix.
Nigella is usually not much better that most of the over sized chefs I see on TV. Except this Christmas she did show us a fresh and healthy red cabbage salad that I pinned down. I love red cabbage but I feel I am always short of original ideas on how to incorporate it.
I tried this particular recipe different times since the beginning of December and...it's a keeper!
I have one comment I would like to add -for those whom also watched the BBC programme: in the programme, Nigella says it is one the salads one can prepare a couple of hours in advance, and still keep it's crispyness... Well, yes indeed, although there is a but. You can prepare it even a day in advance, if you would want to, provided you mix the vegetables but add the dressing at the very last minute...
Ingredients
(good for a side dish for 10)
•half a red cabbage, thinly sliced;
•4 big or 6 small spring onions (trimmed and sliced in 4 cm long batons);
•2 red peppers (seeds and membranes removed; sliced in thin 4 cm long strips);
•1 yellow pepper (seeds and membranes removed; sliced in thin 4 cm long strips);
•1 orange pepper (seeds and membranes removed; sliced in thin 4 cm long strips);
•1 red chili pepper (seeds and membranes removed; diced);
•100 g fresh coriander leaves;
•juice of 2 limes (zest and juice of one; juice of half het second one);
•250 ml pineapple juice (fresh, no additives please!);
•1 1/2 tbsp Himalayan salt (crushed);
•2 tsp sesame oil;
•2 tsp maple syrup (honey or agave are good alternatives);
What you do
•toss all vegetables (except the chili pepper and coriander leaves) in a large bowl;
•mix all the remaining ingredients in a small bowl;
•a little while before serving (30 min.) add the dressing and coriander leaves to the vegetables and mix.
Note
I cannot stress enough how important it is for your health to choose organic produce! If you cannot find it or you cannot afford it, please do wash all your products thoroughly (with warm water) to remove as much chemicals and wax residue as you can, before consumption.
Zesty Smart Cake
Last summer, when flying back to Amsterdam from Minneapolis, I bought an issue of Woman & Home magazine. What caught my eye was the "101 gluten & dairy free recipes & ideas" and the picture of the mouthwatering cake on the cover.
The cake in question, 'Lemon polenta cake with honey drizzle' is indeed gluten-free but not dairy-free. Among the suggested ingredients: 'baking margarine', 'caster sugar' and 'milk'. What a disappointment. Not very smart eating at all, according to my book!
Besides, the fact that cornmeal is 'gluten-free', the latest research tells us this doesn't make it healthy nor a 'smart pick'.
It was very easy to make the original 'Lemon polenta cake with a honey drizzle, an acceptable choice. I used my Meskouta cake recipe as a base. It is simple and fits the bill perfectly.
You need
The cake in question, 'Lemon polenta cake with honey drizzle' is indeed gluten-free but not dairy-free. Among the suggested ingredients: 'baking margarine', 'caster sugar' and 'milk'. What a disappointment. Not very smart eating at all, according to my book!
Besides, the fact that cornmeal is 'gluten-free', the latest research tells us this doesn't make it healthy nor a 'smart pick'.
It was very easy to make the original 'Lemon polenta cake with a honey drizzle, an acceptable choice. I used my Meskouta cake recipe as a base. It is simple and fits the bill perfectly.
You need
•parchment paper
•a round 8 inch (20 cm) spring form pan
•hand mixer
•blender
Ingredients
•2 well cleaned oranges
•2,5 cups (250 g) almond meal
•6 eggs
•1 tsp baking powder
•1/2 cup (120 ml) + 6 tbsp of agave nectar
•juice of 2 lemons
•150 g of raspberries
•150 g of blackberries
•mint sprigs for decoration
•1 tsp baking powder
•1/2 cup (120 ml) + 6 tbsp of agave nectar
•juice of 2 lemons
•150 g of raspberries
•150 g of blackberries
•mint sprigs for decoration
Baking the cake
•boil the (whole) oranges in water for two hours. Then allow them cool down completely. This might take quite a while. Preferably, let them sit in the empty pan overnight after boiling and disposing of the water.
•preheat the oven to 356F (180C)
•grease the pan and line bottom and sides with parchment paper (cut a round circle for the bottom and then a strip to cover the side. The grease will make the paper stick to the pan).
•whisk the eggs and once they are fluffy start pouring the agave into the mix, while you keep the blender running
•add the oranges and puree them with a blender till they have become one with the egg/orange mixture
•add the baking powder to the almond meal
•add the dry mixture to the wet mixture and blend well
•pour into the spring form
•add the oranges and puree them with a blender till they have become one with the egg/orange mixture
•add the baking powder to the almond meal
•add the dry mixture to the wet mixture and blend well
•pour into the spring form
•bake for approximately 45 min (or until you insert a toothpick in the middle and it comes out clean)
•take it out of the oven and allow it to cool down for about 15 min. Then take it out of the spring form, put it on a wire rack.
Lemon syrup
•in a saucepan, put the lemon juice and 6 tbsp of agave nectar; warm up and stir till well combined
•spoon half of the syrup over the cake, while the cake and the syrup are still warm
•once the cake has cooled down, scatter the fruit on top and around the cake
•reheat the rest of the syrup and pour it over the the fruit
•just before serving, decorate with mint leaves
Lemon syrup
•in a saucepan, put the lemon juice and 6 tbsp of agave nectar; warm up and stir till well combined
•spoon half of the syrup over the cake, while the cake and the syrup are still warm
•once the cake has cooled down, scatter the fruit on top and around the cake
•reheat the rest of the syrup and pour it over the the fruit
•just before serving, decorate with mint leaves
Tips & remarks
•I bake in an electric oven where the heat spreads very evenly. I have baked in a gas oven before and notice that for some reason, there is some 'heat loss'. So I have had to increase the heat in a gas oven by 5C/41F
Caveman's Truffles
My most popular posts are those that involve baking and sweets. I understand why. Usually, these recipes are at the top of all black lists -no matter which diet you choose to follow!
The beauty of whole, healthy 'primal' products, is that if you have a bit of imagination and you dare to be adventurous, you can treat yourself to built-free bakes, cakes and yes...truffles! At least once in a while!
What you need
•a food processor
Ingredients
(makes 45 truffles)
•50 g of coconut shreds (unsweetened and pure);
•140 g of raw macadamia nuts
•170 g of raw almonds
•2 tbs of flaxseed
•2 tbs of chia seeds
•1 tbsp of cinnamon
•1 cup of fresh orange juice
•zest of 2 oranges
•2 tbsp of agave nectar (or maple syrup)
•2 tbsp of cacao nibs
•6 tbsp of cacao powder for coating
•8 (Medjool) dates or 10 'regular' dates, unpinned
What you do
•put the coconut, macadamia nuts, almonds, linseed, chia seeds, cinnamon, orange zest, agave nectar, cacao nibs and dates in your food processor and blitz the ingredients till their finely ground
•add the fresh orange juice bit by bit, till the mixture turns into a sticky (but not too wet) paste;
•take the gooey paste into your hands and roll small balls (bite size)
•put them on a flat surface and into the fridge for approx. 1 hour
•coat them with cacao powder and serve
Notes
I haven't tried it yet but I am pretty sure it is possible to freeze the balls (uncoated).
The beauty of whole, healthy 'primal' products, is that if you have a bit of imagination and you dare to be adventurous, you can treat yourself to built-free bakes, cakes and yes...truffles! At least once in a while!
What you need
•a food processor
Ingredients
(makes 45 truffles)
•50 g of coconut shreds (unsweetened and pure);
•140 g of raw macadamia nuts
•170 g of raw almonds
•2 tbs of flaxseed
•2 tbs of chia seeds
•1 tbsp of cinnamon
•1 cup of fresh orange juice
•zest of 2 oranges
•2 tbsp of agave nectar (or maple syrup)
•2 tbsp of cacao nibs
•6 tbsp of cacao powder for coating
•8 (Medjool) dates or 10 'regular' dates, unpinned
What you do
•put the coconut, macadamia nuts, almonds, linseed, chia seeds, cinnamon, orange zest, agave nectar, cacao nibs and dates in your food processor and blitz the ingredients till their finely ground
•add the fresh orange juice bit by bit, till the mixture turns into a sticky (but not too wet) paste;
•take the gooey paste into your hands and roll small balls (bite size)
•put them on a flat surface and into the fridge for approx. 1 hour
•coat them with cacao powder and serve
Notes
I haven't tried it yet but I am pretty sure it is possible to freeze the balls (uncoated).
Zucchini Bread
One of the most difficult things for health conscious newbies is to say goodbye to bread. I never really had much bread before I changed my diet... So I have not missed bread with the meals as much as I thought I would.
But we are all different and if you have been programmed to have bread on a daily basis, it is difficult -at least in the beginning- to live without it.
So for those in bread-withdrawal (and for those that are not), here is a amazing alternative. The perfect (savoury) zucchini bread that you can use the same way you would use any 'regular' loaf of bread. You can even toast it!
There are quite a few recipes on internet for zucchini bread. I tried out many and didn't like a single one. But maybe it is just me... Most of them have banana in it, cinnamon? raisins? No. I definitely did not like the mix of zucchini with sweet ingredients.
So here is my own concoction. I hope you like it as much and my friends and my family members do!
What you need
•a bread pan 27 cm long, 11,5 cm wide and 8 cm high
Ingredients
•200 g of almond meal
•270 g of grated unpeeled zucchini (previously washed and dried)
•3 medium sized eggs
•1 tsp Himalayan salt
•1/2 tsp baking soda
•1/3 cup melted coconut oil
•1 tbs herbes de provence
•50 g pine nuts (previously roasted)
What you do
•preheat the oven to 190°C
•grease your baking pan or otherwise line it with parchment paper
•combine all the ingredients and blend well
•pour the mixture into your baking pan and bake for about 45 min. (or until a toothpick inserted in the middle of the bread comes out clean);
•cool (almost completely) and slice
Notes
•you will be able to get approximately 8-10 slices out of this loaf
•you could freeze it, but there is nothing like biting into the freshly made bread!
•if you decide not to freeze it, you could put it in the fridge and keep it a few days...
But we are all different and if you have been programmed to have bread on a daily basis, it is difficult -at least in the beginning- to live without it.
So for those in bread-withdrawal (and for those that are not), here is a amazing alternative. The perfect (savoury) zucchini bread that you can use the same way you would use any 'regular' loaf of bread. You can even toast it!
There are quite a few recipes on internet for zucchini bread. I tried out many and didn't like a single one. But maybe it is just me... Most of them have banana in it, cinnamon? raisins? No. I definitely did not like the mix of zucchini with sweet ingredients.
So here is my own concoction. I hope you like it as much and my friends and my family members do!
What you need
•a bread pan 27 cm long, 11,5 cm wide and 8 cm high
Ingredients
•200 g of almond meal
•270 g of grated unpeeled zucchini (previously washed and dried)
•3 medium sized eggs
•1 tsp Himalayan salt
•1/2 tsp baking soda
•1/3 cup melted coconut oil
•1 tbs herbes de provence
•50 g pine nuts (previously roasted)
What you do
•preheat the oven to 190°C
•grease your baking pan or otherwise line it with parchment paper
•combine all the ingredients and blend well
•pour the mixture into your baking pan and bake for about 45 min. (or until a toothpick inserted in the middle of the bread comes out clean);
•cool (almost completely) and slice
Notes
•you will be able to get approximately 8-10 slices out of this loaf
•you could freeze it, but there is nothing like biting into the freshly made bread!
•if you decide not to freeze it, you could put it in the fridge and keep it a few days...
Banana Bread with a Crunch
Getting banana bread just right is not as easy as one would think. Specially if you prefer it without chocolate (chips), like I do. But in the long run, what really makes all the difference is using pure, preferably organic produce.
•2 medium ripe bananas, mashed
•2 tbsp of melted coconut oil
•1 tbsp of coconut oil (for greasing)
•2 + 1 tbsp of agave nectar
•1 tbsp of (real!) vanilla extract
•3 medium sized eggs
•100 g of almond flour
•50 g of coconut flour
•1 1/2 tsp of baking soda
•1/2 tsp of sea salt
•1 tsp of allspice
•40 g of chopped walnuts
What you do
•preheat the oven to 175°C
•grease a loaf pan of 12 x 28 cm with coconut oil
•in a blender, whip up the eggs and then reduce the speed and add the wet ingredients until everything is well combined
•mix the dry ingredients together first and then add to the wet mixture
•now pour everything into the baking loaf pan
(the mixture will be thick and you will need to smooth it evenly with a rubber spatula of the back of a tablespoon)
•now bathe the chopped walnuts with 1 tbs of agave and with your hand, sprinkle it evenly over the top
•place the loaf pan in the middle of the oven and bake for approximately 30 minutes (till the mixture is dry in the inside)
Notes
•why agave nectar instead of honey?
Agave nectar has a lower GI than honey and is therefore healthier for you
Honey will caramelize in the oven; this will make your cakes look dark in the inside and give it a bit of a 'burnt' aftertaste....
•what if you cannot find agave nectar in your region?
Try maple tree syrup if you are in North America; in South America I have experimented with lemon tree syrup and this works well too. You would think the citrus taste would be overwhelming but it is not...
I went through trial and error and I am quite happy to share the result!
Ingredients
(for 12 medium sized slices)•2 medium ripe bananas, mashed
•2 tbsp of melted coconut oil
•1 tbsp of coconut oil (for greasing)
•2 + 1 tbsp of agave nectar
•1 tbsp of (real!) vanilla extract
•3 medium sized eggs
•100 g of almond flour
•50 g of coconut flour
•1 1/2 tsp of baking soda
•1/2 tsp of sea salt
•1 tsp of allspice
•40 g of chopped walnuts
What you do
•preheat the oven to 175°C
•grease a loaf pan of 12 x 28 cm with coconut oil
•in a blender, whip up the eggs and then reduce the speed and add the wet ingredients until everything is well combined
•mix the dry ingredients together first and then add to the wet mixture
•now pour everything into the baking loaf pan
(the mixture will be thick and you will need to smooth it evenly with a rubber spatula of the back of a tablespoon)
•now bathe the chopped walnuts with 1 tbs of agave and with your hand, sprinkle it evenly over the top
•place the loaf pan in the middle of the oven and bake for approximately 30 minutes (till the mixture is dry in the inside)
Notes
•why agave nectar instead of honey?
Agave nectar has a lower GI than honey and is therefore healthier for you
Honey will caramelize in the oven; this will make your cakes look dark in the inside and give it a bit of a 'burnt' aftertaste....
•what if you cannot find agave nectar in your region?
Try maple tree syrup if you are in North America; in South America I have experimented with lemon tree syrup and this works well too. You would think the citrus taste would be overwhelming but it is not...
Creamy Parsnip Chowder
In winter, a creamy chowder is my comfort food! Soups are easy to make and will really stand out when you make them yourself, from scratch.
If you own a (Vitamix®) blender, it is very easy to accomplish a wonderful creaminess without the use of a single drop of dairy!
Ingredients
(serves 4 to 6)
•4 tbsp of coconut oil
•1 large (sweet) onion, peeled and chopped
•250 g of carrots, peeled and chopped
•500 g of parsnips, peeled and chopped
•a dice-size piece of ginger, peeled and chopped
•1 level tsp of grated orange grind
•750 ml of vegetable stock
•freshly ground fresh pepper
•fresh coriander to garnish
What you do
•melt the coconut in a large saucepan over low heat
•add the chopped onion and stir until soft
•add carrot, parsnip and stir for approx. 5 minutes (unit the vegetables have soften a little)
•now add the ginger, the orange rind and stock
•bring everything to a boil, add the pepper and then reduce the heat
•simmer for 45 minutes
•remove from the heat and after letting it cool down for 15 minutes, transfer the soup to your blender and whizz until very smooth
•rinse your original sauce pan and return the soup to the pan
•reheat the soup if necessary over a very low heat
•ladle the soup into soup bowls
•garnish your parsnip soup with a sprig of coriander
Suggestion
Serve with homemade crackers!
If you own a (Vitamix®) blender, it is very easy to accomplish a wonderful creaminess without the use of a single drop of dairy!
Ingredients
(serves 4 to 6)
•4 tbsp of coconut oil
•1 large (sweet) onion, peeled and chopped
•250 g of carrots, peeled and chopped
•500 g of parsnips, peeled and chopped
•a dice-size piece of ginger, peeled and chopped
•1 level tsp of grated orange grind
•750 ml of vegetable stock
•freshly ground fresh pepper
•fresh coriander to garnish
What you do
•melt the coconut in a large saucepan over low heat
•add the chopped onion and stir until soft
•add carrot, parsnip and stir for approx. 5 minutes (unit the vegetables have soften a little)
•now add the ginger, the orange rind and stock
•bring everything to a boil, add the pepper and then reduce the heat
•simmer for 45 minutes
•remove from the heat and after letting it cool down for 15 minutes, transfer the soup to your blender and whizz until very smooth
•rinse your original sauce pan and return the soup to the pan
•reheat the soup if necessary over a very low heat
•ladle the soup into soup bowls
•garnish your parsnip soup with a sprig of coriander
Suggestion
Serve with homemade crackers!
Blueberry Muffins
I have tried various paleo recipes for blueberry muffins. I wasn't too happy with any of the ones I found. You would think there is no great science to baking a 'grain-free' 'dairy-free' blueberry muffin... Yet, there is.
All the recipes I came across had practically identical ingredients; still the outcome was not convincing.
It took some experimenting to realise the ingredients suggested were actually fine, but there always something preventing the perfect outcome: either the heat of the oven, the cooking time, the way the different ingredients were put together or the amount of eggs....
Anyway, I am ready to share the muffins that made my day! I hope they make yours!
What you need
•muffin tray
•6 muffin liners
Ingredients
(makes 6 muffins)
•200 g almond flour
•4 medium size/large organic eggs
(if your eggs are small, use 5)
•1/2 tsp baking soda
•1 tsp apple cider vinegar
•200 g organic blueberries, washed
•1/2 tsp of vanilla extract
•1/3 cup of agave nectar
Instructions
•preheat the oven to 165°C
•in a medium sized bowl, mix the dry ingredients
•in another mixing bowl, combine the wet ingredients
•now pour and mix wet ingredients into dry ingredients
•fold the blackberries into the mix, gently (preferably with a rubber spoon)
•line the muffing baking tray with muffin liners
•scoop the batter and divide evenly into the muffin tray
•bake for 30 min. until golden brown
Stuffed Tomatoes
Here is a super-easy, super-healthy dish to either add to a buffet, to serve as your appetizer dish of a multi-course meal or take to friends when they invite you over for drinks and finger food! It's versatile and fast to prepare.
Also, I bet you can make it with the ingredients you have in your cupboard! No need to go out and shop for 'that one thing you are missing'!
Ingredients
(makes 10 small tomatoes or 8 medium sized ones)
•2 cans of cooked tuna in water
(needless to say that fresh tuna grilled at home will always taste better and be healthier...)
•2 Tbs of home made or organic mayonnaise
•20 calamata or (black) olives (pit removed) + 10 more for decoration
•1 medium red onion
•pinch of Himalayan rock salt and freshly ground pepper
What you do
•Cup the top of the tomatoes and removed all seeds and flesh
•Turn the tomatoes upside down and let them drain all extra fluids (approx. 10 min.)
•In the meantime, put the tuna, onion, mayonaise in a food processor and grind to a paste;
•Now add salt and pepper to taste and mix;
•Add the 20 calamata olives and blend for just a second (you want the black calamatas to show in your mix and give it structure);
•Finely stuff the tomatoes and decorate with a black olive on the top.
Enjoy!
Also, I bet you can make it with the ingredients you have in your cupboard! No need to go out and shop for 'that one thing you are missing'!
Ingredients
(makes 10 small tomatoes or 8 medium sized ones)
•2 cans of cooked tuna in water
(needless to say that fresh tuna grilled at home will always taste better and be healthier...)
•2 Tbs of home made or organic mayonnaise
•20 calamata or (black) olives (pit removed) + 10 more for decoration
•1 medium red onion
•pinch of Himalayan rock salt and freshly ground pepper
What you do
•Cup the top of the tomatoes and removed all seeds and flesh
•Turn the tomatoes upside down and let them drain all extra fluids (approx. 10 min.)
•In the meantime, put the tuna, onion, mayonaise in a food processor and grind to a paste;
•Now add salt and pepper to taste and mix;
•Add the 20 calamata olives and blend for just a second (you want the black calamatas to show in your mix and give it structure);
•Finely stuff the tomatoes and decorate with a black olive on the top.
Enjoy!
Hash Browns
When changing eating habits and ridding myself of all grains, one of the things I missed on my Sunday American breakfast menu were hash browns. Admittedly, using yams is a good option, but if you are looking for an alternative that tastes astonishing like the real thing, you will love this recipe.
Ingredients
•1 cauliflower head, shredded
•2 eggs
•1 tsp dried oregano
•2 tbsp coconut oil, melted
•1/2 tsp Himalayan salt
What you do
•in a pan, sautĂ© the cauliflower in 1 tbsp of coconut out until 'al dente';
•once the cauliflower has cooled down, transfer it to a bowl and add the eggs, dried oregano and salt;
•warm up the frying pan again, add 1 tbsp of coconut oil and once the pan is warm, add the cauliflower mixture;
•once the bottom is golden brown, turn the cauliflower 'cake' around using a flat plate;
•cook the other side until golden brown.
Remarks
•I used a 27 cm diameter pan; this makes a 1,2 cm thick cauliflower cake
Enjoy!

Home Made Crackers
It is pretty cool -and hopeful- to see how rapidly the food paradigm is changing. More and more people are questioning their food choices, becoming more demanding as consumers. Supermarkets are having to adapt to new lifestyle demands.
My husband and I have kept a Friday Night Fun (FNF) tradition going for years now. It is that precious time at the end of the week when we sit down together for a drink, reflect on the past days, share our stories and plot the days to come.
What we prepare for our FNF-time has changed considerably throughout the years. Potato chips with additives and tons of salt, have been replaced by cassava crisps 'au naturel'; peanuts made room for walnuts, cashew nuts, almonds and macadamia nuts; rubbery cheese was substituted by olives.
(Keep your eyes peeled for my upcoming post 'Friday Night Fun' for a list of ideas....)
I have been buying (raw vegetable/seed) crackers from Lifefood for quite a while. They can be quite pricey and need to be shipped (which in itself is not particularly environmentally friendly....).
A good friend from South Africa visited us a few months ago. Darren couldn't believe I didn't make my own. "It's so easy and fun!", he said.
I tried his recipe and believe you me, it's 'fool proof', quick to prepare and absolutely delicious. The best part? They taste way better than any cracker I have ever purchased!
This is the tool you have been looking for, to compliment your home made dips! Or to offer your bread-munger friends during a sit-down meal! The ingredients have tons of health benefits, too many to list. But I do encourage you to look up the links for more in-depth information.
Ingredients
(for 3 oven trays)
•200 g sunflower seeds
•60 g flax seed
•100 g (hulled) sesame seeds
•2 tbs psyllium seed husks
•500 ml water (room temperature)
•1tsp crushed Himalayan salt
What you do
•preheat the oven to 160°C;
•cover 3 oven trays (or flat baking trays) with parchment paper;
•combine all dry ingredients in a bowl and add the water; leave the mixture to stand for 5 minutes. Mix well;
•spread the mixture on the baking tray carefully, making use of the back of a metal spoon. The spread should have no holes in it;
•bake in the oven until crispy (approx. 60-65 min.);
•remove from the oven and as soon as the baking tray allows it, remove the parchment paper from the cracker spread and let the cracker cool down either on a rack or standing up;
•once cooled, break the crackers into any size or shape you like and store left overs (if any!) in an airtight container.
Remarks
•you want to work the uncooked seed mixture into the tray without loosing time. The longer you wait, the more sticky the mixture will get as the psyllium hardens. This will make it increasingly more difficult to spread the raw mixture onto the tray in an evenly fashion;
•even though the original recipe calls for "spreading the mixture as thin as possible onto the tray", I tried thicker and thinner options and liked the slightly thicker result better. Experiment and see what you prefer. Do keep in mind you do want to spread the mixture evenly for it to cook properly...
•the first time I made these, I did not remove the parchment paper from the cracker till half an hour after the cracker had come out of the oven. This turned out to be a big mistake :-( The steam coming off the baked cracker condescend at the bottom/paper end and ruined the cracker... I ended up 'saving' it by putting the cracker chunk back into the oven for a few minutes (this time with no paper of tray, just on the rack) to dry. Worked like a charm!
•if the raw mixture starts sticking to your metal spoon, dip the spoon in a glass of water and carry on. This should do the trick!
My husband and I have kept a Friday Night Fun (FNF) tradition going for years now. It is that precious time at the end of the week when we sit down together for a drink, reflect on the past days, share our stories and plot the days to come.
What we prepare for our FNF-time has changed considerably throughout the years. Potato chips with additives and tons of salt, have been replaced by cassava crisps 'au naturel'; peanuts made room for walnuts, cashew nuts, almonds and macadamia nuts; rubbery cheese was substituted by olives.
(Keep your eyes peeled for my upcoming post 'Friday Night Fun' for a list of ideas....)
I have been buying (raw vegetable/seed) crackers from Lifefood for quite a while. They can be quite pricey and need to be shipped (which in itself is not particularly environmentally friendly....).
A good friend from South Africa visited us a few months ago. Darren couldn't believe I didn't make my own. "It's so easy and fun!", he said.
I tried his recipe and believe you me, it's 'fool proof', quick to prepare and absolutely delicious. The best part? They taste way better than any cracker I have ever purchased!
This is the tool you have been looking for, to compliment your home made dips! Or to offer your bread-munger friends during a sit-down meal! The ingredients have tons of health benefits, too many to list. But I do encourage you to look up the links for more in-depth information.
Ingredients
(for 3 oven trays)
•200 g sunflower seeds
•60 g flax seed
•100 g (hulled) sesame seeds
•2 tbs psyllium seed husks
•500 ml water (room temperature)
•1tsp crushed Himalayan salt
What you do
•preheat the oven to 160°C;
•cover 3 oven trays (or flat baking trays) with parchment paper;
•combine all dry ingredients in a bowl and add the water; leave the mixture to stand for 5 minutes. Mix well;
•spread the mixture on the baking tray carefully, making use of the back of a metal spoon. The spread should have no holes in it;
•bake in the oven until crispy (approx. 60-65 min.);
•remove from the oven and as soon as the baking tray allows it, remove the parchment paper from the cracker spread and let the cracker cool down either on a rack or standing up;
•once cooled, break the crackers into any size or shape you like and store left overs (if any!) in an airtight container.
Remarks
•you want to work the uncooked seed mixture into the tray without loosing time. The longer you wait, the more sticky the mixture will get as the psyllium hardens. This will make it increasingly more difficult to spread the raw mixture onto the tray in an evenly fashion;
•even though the original recipe calls for "spreading the mixture as thin as possible onto the tray", I tried thicker and thinner options and liked the slightly thicker result better. Experiment and see what you prefer. Do keep in mind you do want to spread the mixture evenly for it to cook properly...
•the first time I made these, I did not remove the parchment paper from the cracker till half an hour after the cracker had come out of the oven. This turned out to be a big mistake :-( The steam coming off the baked cracker condescend at the bottom/paper end and ruined the cracker... I ended up 'saving' it by putting the cracker chunk back into the oven for a few minutes (this time with no paper of tray, just on the rack) to dry. Worked like a charm!
•if the raw mixture starts sticking to your metal spoon, dip the spoon in a glass of water and carry on. This should do the trick!
Ceviche with Pzazz
Lotty is my
very dear friend from Ecuador. She is also my neighbour. Without her warmth I don’t know if I would be able to survive Dutch winters.
Besides being
a loving person and good friend, she is also one of the best cooks I know! Of
all her dishes I would have say her crab & prawn ceviche ranks #1 by far.
Ceviche is a
very popular dish in Bolivia, PerĂº and Ecuador. You can use different types of
fish for it.
In South
America is it usually served as an appetizer. But glam it up with a couple of
side dishes and you have the perfect meal.
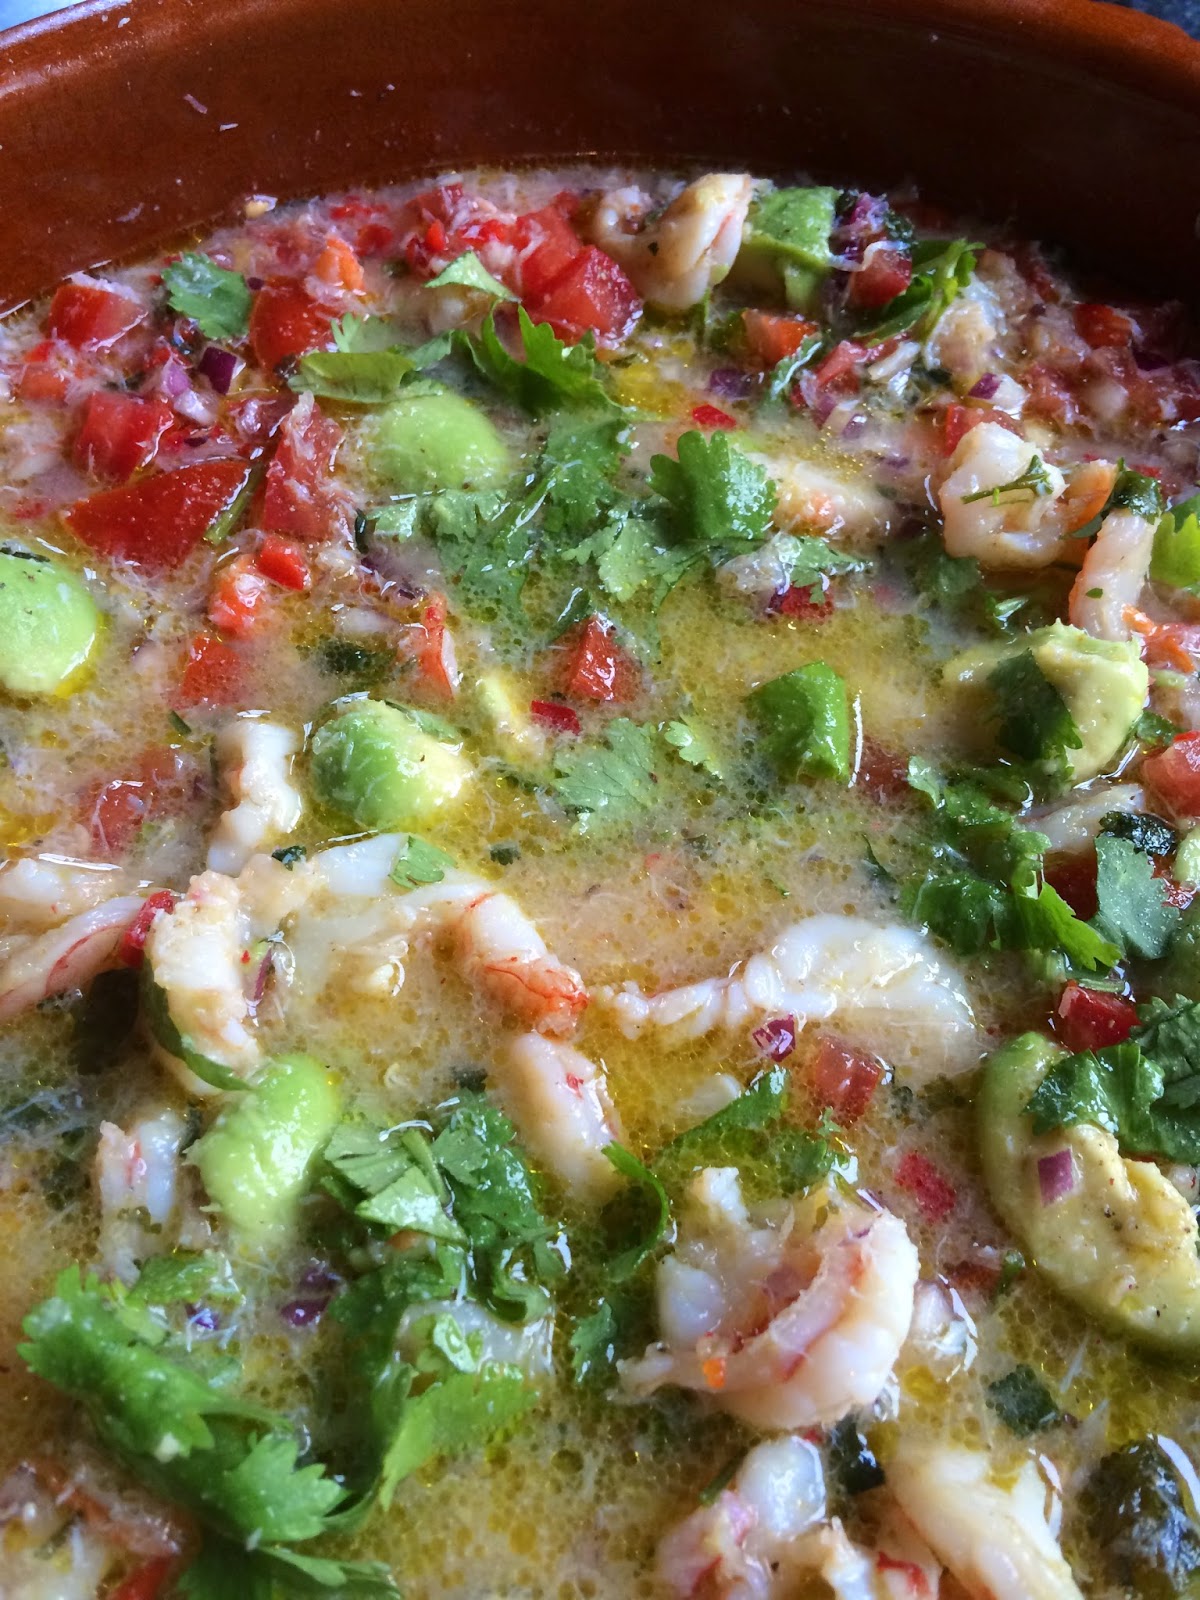
I have tried her recipe many times. Now that according to Lotty I have (almost) mastered perfection, I am ready to audition my recipe! Ceviche has become more and more popular around the world, specially in trendy restaurants in cosmopolitan areas. While in Miami last winter, I tried every ceviche I could find on the menu.
I took her recipe but then gave it my own twist. When she tastes mine she tends to shake her head and say 'nope, too much cumin'. But you know, I really love the extra pzazz!
Ingredients
(for 4 to 6 people)
•400g of clean raw prawns (mid size)
•400g of crab
meat
•2 medium diced
tomatoes (seeds removed)
• a handful of chopped
cilantro
•3 hot chili
peppers (seeds removed, chopped)
•pinch of
Hilamayan pink salt; crushed
•(the juice of) 8 limes
•(the juice of) 1/2 orange
•1 tsp of
cumin
•1/4 cup extra virgin oil
•2 medium red
onions, chopped
•1 avocado, diced
What you do
•slice the
prawns lengthwise in half, and leave them to marinate in a bowl for at least an hour in some salt and cumin;
• then put them in a pan with some water (enough to
cover them) and some extra salt;
•once the
water reaches boiling point, remove the pan from the heat source immediately and leave the prawns to cool down in the pan;
•in a bowl, chop the red onion, the tomatoes and the red chili peppers;
•add the lime and orange juice;
•add the crab meat (and any water it might release), the prawns and the water you cooked them in;
•add the avocado;
•add the extra virgin oil;
•sprincle a generous amount to fresh cilantro
•cover with some cling foil and put in the fridge
Remarks
•ceviche is best served cold and when the ingredients have had the chance to blend for at least a couple of hours;
•if you cannot find crab meat or you find it too expensive in your area, replace it by (very fresh and very thinly sliced, raw) white fish;
•some of the side dishes you could add are: steamed yams or cassava; cassava chips; fried banana.Spanish Peppers Stuffed with Cod
One of my favourite Spanish dishes has to be 'Pimientos del Piquillo'. It is a very traditional dish which consists of stuffing char-grilled sweet red peppers from Lodosa (Northern Spain). The red peppers from this region have a particular shape -which makes them easy to stuff without cutting them open. The consistency of the skin is thick and hard and therefore will not tare easy during stuffing.
Unless you live in Spain, it is impossible to find them fresh -only jarred. Given the choice between using the authentic precooked jarred pimientos del piquillo from Spain to your local red peppers, I will no hesitate to choose the latter.
The original recipe calls for cod to stuff them. But if cod is too expensive (or unavailable) in your area, you can actually pick any other white flaky fish instead.
You can make this dish 1 day ahead and reheat. Actually, it will taste better if you do, than if you eat it right ahead.
What you need
•a cooking pot with a lid;
•food processor;
•oven tray;
•oven dish;
•12 tooth picks
Ingredients
(for 6 peppers)
•6 red peppers (for stuffing)
•1 red pepper, diced (for sauce)
•300 g of cod
•1 leak, thoroughly cleaned and sliced in thin rings
•80 ml white wine
•80 ml tomate frito
•80 ml water
•fresh parsley
•1 clove of garlic, minced
•freshly grind pepper
•freshly grind Himalayan salt
•1 tbs agave nectar
•2 tbs virgin olive oil
What you do
•start by making the sauce and fry the leak rings in 1 tbs of virgin olive oil and 3 min. later add the diced red pepper. Cook while moving it around with a wooden spoon;
•add the tomate frito and the white wine;
•add some salt and pepper;
•cook for approx. 1 hour at very low heat and in a covered pot; from time to time add some water to keep the sauce runny;
•if necessary, add 1 tbs of agave nectar. Personally I find that, depending on the quality of the pepper you used for the sauce, it might not even be necessary. Taste the sauce and see what your taste buds tell you....
•now that the sauce is cooking, preheat the oven to 195C and when the oven has reached this temperature, wash the red pepers thoroughly with hot water and place 6 in a baking tray (making sure the do not touch each other);
•cook in the middle of the oven for approx. 30 min (look at the picture below to get an idea of how the peppers should look);
•remove the peppers from the oven and let them rest on your kitchen counter till they cool down a bit;
•in the meantime, you could work on the cod stuffing by frying the diced onion and minced garlic in 1 tbs of virgin olive oil and 3 min. later, adding the cod, some salt and pepper. When the cod is almost cooked, cut some parsley on top of it with a scissors. Turn off the heat;
•once the grilled peppers have cooled off, remove the skin. Then, gently cut them in half and removed the stem and seeds;
•stuff the peppers with the cod and close them with toothpicks;
•gently arrange the stuffed peppers in an oven dish;
•now put the sauce in a food processor and blend it smooth;
•over the peppers with it;
Remarks
You can now either wait for everything to cool down, cover the dish with some foil and keep it in the fridge for one or two days or...you can put it back in the oven. Crank the heat to 240C en warm everything up for approx. 15 min. before serving!
Red peppers and in the top 5 of most sprayed vegetable! If possible, buy organic. If not, make sure you was the vegetables very well under piping hot water. That will take a lot of the chemicals of the surface.
Unless you live in Spain, it is impossible to find them fresh -only jarred. Given the choice between using the authentic precooked jarred pimientos del piquillo from Spain to your local red peppers, I will no hesitate to choose the latter.
The original recipe calls for cod to stuff them. But if cod is too expensive (or unavailable) in your area, you can actually pick any other white flaky fish instead.
You can make this dish 1 day ahead and reheat. Actually, it will taste better if you do, than if you eat it right ahead.
What you need
•a cooking pot with a lid;
•food processor;
•oven tray;
•oven dish;
•12 tooth picks
Ingredients
(for 6 peppers)
•6 red peppers (for stuffing)
•1 red pepper, diced (for sauce)
•300 g of cod
•1 leak, thoroughly cleaned and sliced in thin rings
•80 ml white wine
•80 ml tomate frito
•80 ml water
•fresh parsley
•1 clove of garlic, minced
•freshly grind pepper
•freshly grind Himalayan salt
•1 tbs agave nectar
•2 tbs virgin olive oil
What you do
•start by making the sauce and fry the leak rings in 1 tbs of virgin olive oil and 3 min. later add the diced red pepper. Cook while moving it around with a wooden spoon;
•add the tomate frito and the white wine;
•add some salt and pepper;
•cook for approx. 1 hour at very low heat and in a covered pot; from time to time add some water to keep the sauce runny;
•if necessary, add 1 tbs of agave nectar. Personally I find that, depending on the quality of the pepper you used for the sauce, it might not even be necessary. Taste the sauce and see what your taste buds tell you....
•now that the sauce is cooking, preheat the oven to 195C and when the oven has reached this temperature, wash the red pepers thoroughly with hot water and place 6 in a baking tray (making sure the do not touch each other);
•cook in the middle of the oven for approx. 30 min (look at the picture below to get an idea of how the peppers should look);
•remove the peppers from the oven and let them rest on your kitchen counter till they cool down a bit;
•in the meantime, you could work on the cod stuffing by frying the diced onion and minced garlic in 1 tbs of virgin olive oil and 3 min. later, adding the cod, some salt and pepper. When the cod is almost cooked, cut some parsley on top of it with a scissors. Turn off the heat;
•once the grilled peppers have cooled off, remove the skin. Then, gently cut them in half and removed the stem and seeds;
•stuff the peppers with the cod and close them with toothpicks;
•gently arrange the stuffed peppers in an oven dish;
•now put the sauce in a food processor and blend it smooth;
•over the peppers with it;
Remarks
You can now either wait for everything to cool down, cover the dish with some foil and keep it in the fridge for one or two days or...you can put it back in the oven. Crank the heat to 240C en warm everything up for approx. 15 min. before serving!
Red peppers and in the top 5 of most sprayed vegetable! If possible, buy organic. If not, make sure you was the vegetables very well under piping hot water. That will take a lot of the chemicals of the surface.
Subscribe to:
Posts (Atom)