Bewitched Pumpkin Pie


I remember when we first moved to the Netherlands, nobody had even heard of Halloween -except maybe for the lovers of Hollywood horror movies. As time went by, more and more people in Europe caught the bug.
This year, I finally see everybody truly warmed up for the occasion; some are even organizing Halloween party's!

We have a house full for Halloween tomorrow. I challenged my guests to bring 'healthy treats' for the children (I am very curious what they will come up with), while I promised to cater to bar food & drinks.

There is no Halloween without a pumpkin pie, right? So here is my dairy and grain free version of it.

Enjoy and have fun everybody. Happy Halloween!


What you need
•a round, oven proof pie dish, 27/30 cm diameters wide
•a steaming basket
•parchment paper

Ingredients
(for 8 generous servings)
•150 g almond flower
•8 eggs
•2 x butternut squash (of approx. 1.8 kg)
•70 g of raw walnuts
•35 g of raw cashews
•1/4 cup of agave nectar
•200 ml of coconut milk
•1 tsp of ginger
•1 tsp of all spice
•1/2 tsp of nutmeg
•1/2 tsp of cloves
•1/2 tsp of cardamon
•1/4 tsp of salt
•1 tsp of coconut oil for greasing


What you do
•wash, part and steam the pumpkin at medium heat till tender (it will take approx. 20 min.). Then remove the flesh and let the puree cool down. You should have about 1 kg.
•pre-heat the oven to 190C
•grease the pie pan with coconut oil
•line the bottom of the pan with parchment paper;
•in a bowl combine almond meal, one egg plus one egg white and a pinch of salt; mix till it becomes a nice whole
•now grease your hands (to prevent the dough from sticking to your fingers) and cover the pie dish with the almond meal dough, flattening it with the palm of your hand and fingers
•poke some wholes with a fork into the dough and place it in the oven for approx. 15 min or till it is light brown
•now put the pumpkin puree in a bowl and add all the spices, the agave syrup 6 eggs and the left over yolk to the pumpkin mixture (make sure the pumpkin has cooled down);
•when the pie crust is ready and comes out of the oven, pour the pumpkin mixture into it and return to the oven
•bake for approx. another 1h 40 min (check with a toothpick)
•let it cool down for approx. 10 min and then slice

Remarks
•If you find the top of the pie gets too golden too quick, cover it pan with some aluminum foil. Make sure not to tuck it! You don't want it to stick to your pie!
•Sometimes it is a bugger to find salt-free nuts. No worries. Just wash them under running water and let them dry on a kitchen towel!


Bacon & Eggs for Multitasking Kitchen Queens

I am sure you have been faced with the problem of preparing bacon and eggs for a big group before. Even if you are the best multitasking kitchen queen, it is almost impossible to expedite 12 eggs with a side of bacon at the same time without letting half get cold and the other half overcook.

A few months ago while visiting dear friends in Denmark, Johs H. showed me a simple way to make perfect eggs with crispy bacon for 12, stress free.

This method will allow you to bring all eggs and bacon to the table perfectly al dente. A fun side effect is everybody will also compliment the presentation!

What you need
•muffin baking tray for 12

Ingredients
(for 12 servings)
•24 thin strips of organic bacon
•12 eggs

What you do
•turn the oven to 200°C
•line the inside of each muffin mold with bacon
•crack an egg inside of each muffin mold
•put the tray inside the oven and bake for approx. 10-15 min.

Remarks
•if your bacon has a lot of fat, remove excess fat from the strip before lining the muffin tray
•smoked salmon (instead of bacon) works really well! So does ham....
•keep an eye on the eggs... You know best how cooked you like them....


Thank you Johs for sharing your secret!


Molten Chocolate Fix

When we first commit to a healthier diet, the first thing we try to do is work hard at mimicking the previous unhealthy foods we used to eat. Life is easier if you stay away from “paleofied” foods altogether. They never really taste quite the same as their unhealthy counterparts that irritate your stomach or cause rampant inflammation.... But just like you, I am human, and once in a while I do need my decadent fix. 
And so do a lot of my readers. The desserts in this blog get the most hits!

So to you, and for me, here is this easy to make Molten Chocolate Fix.

What you need
•4 oven proof ramekins
•mixer

Ingredients
(4 servings)
•115 g bitter chocolate (70% or higher)
•1/2 tsp pure vanilla extract
•pinch of salt (1/8 tsp)
•1 tbsp clear agave nectar
•1 tsp coconut flour
•2 tsp cocoa powder (use the real thing! Don't monkey around with Nesquik-like mixes)
•2 eggs
•4 tbsp extra virgin coconut oil + 1 tsp to grease ramekins)

What you do
•preheat the oven to 190°C
•grease 4 ramekins with coconut oil
•melt the chocolate and coconut oil in a pan at low heat or in a microwave-safe bowl at low power; do not let the chocolate overheat
•place the eggs, vanilla, salt and agave and using a mixer, mix at high speed till the eggs are light and frothy (it will take approx. 5 min)
(and yes, it will work with agave nectar...)
•gently scoop the egg mixture into the chocolate and fold together using a spatula
•sift cocoa chocolate and coconut flower into the egg-chocolate mixture and keep folding the ingredients together in a gently manner
•pour batter into the ramekins (it will only fill up 2/3 of it)
•place ramekins in a baking sheet and then into the oven and bake for 13 min.

Remarks
•I like my Molten Chocolate Fix warm! If you are just as demanding as I am, what you could do is measure and prepare all ingredients ahead of time, grease the ramekins and turn the oven on just before sitting down for dinner. You can then easily put the batter together in 7 min and have the desserts on the table in another 13.
•You want to serve Molten Chocolate Fix on a plate? Grease the ramekin and then dust it with cocoa powder; this will facilitate removing Molten Chocolate Fix from the ramekin
•Want to add some color to it? Place a couple of raspberries on the side!


Catch of the Day Chowder


It is windy and rainy in my neck of the woods so I say, bring on the chowders!
This one is an amazing, mouth watering experience. If you didn't like fish before, you will now!
Guaranteed!
And the cool thing about it, is that you can use the catch of the day to prepare it, whatever this might be on your side of the globe.

What you need
•3l pan
•blender

Ingredients
(for 8 bowls of soup)
•1 medium onion; chopped
•1 medium tomato; diced
•400 g of yams, skin removed and diced
•150 g of carrots, washed and diced
•1 tbs of Patak's Mild Curry Paste
•1 l of fish stock
•200 ml coconut milk
•300 g of white fish, cut into chunks
•3 to 4 leaves of Thai basil
•2 tbs coconut oil
Himalayan salt and freshly grinded pepper

What you do
•melt the coconut oil in a pan over medium heat
•add the chopped onion and 'sweat' them
•lower the heat and add the curry paste
•once the paste releases all it's amazing spicy odors, add the diced tomato, yams, carrots and basil leafs
•3 min later add the fish stock and bring to the boil
•cook for approx. 18 min then add the white fish
•simmer for approx. another additional 10 min then turn the heat source off and let it cool down a bit
•carrots, yams and fish should be soft by now
•blend and either return to the pan and heat up a bit before serving or pour into Tupperware containers and once cold, freeze

Remarks
•I can highly recommend serving it with dehydrated raw food vegetable chips
•Even though Patak's Mild Curry Paste does contain a few substances I like to avoid, it's a great solution for the one time you are in a hurry. If at all possible, replace any pre-fab curry paste by these virgin ingredients: coriander, cumin, turmeric, tomato puree, chili, ground ginger, mustard, tamarind, garlic, agave, curry and coconut oil. The same goes for the sweet Thai basil. If you can get hold of the fresh leaves, do not even think about using the dry kind!


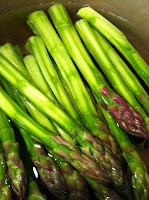
Flemish Asparagus

The way Flemish people really like their asparagus is similar. Except the sauces they dress up their asparagus with, usually contain quite a bit of butter, which, as you can imagine, my version does not.
There are tons of ways to upgrade simple asparagus into a main course. Let me give you a few ideas...

For those of you whom sometimes ask me 'where do you get your nutrients if you do not eat grains?' and look puzzled at me when I say ' from fish, meat but mainly from vegetables', I have linked 'asparagus' to a nutrient chart. You will be blown away when you see what just 130 g of asparagus will do to your body while adding just 28 Kcal to the daily intake! Check it out.

What you need
•nothing that you would not normally have in any kitchen

Ingredients
(per person)
•15 asparagus per person (give or take a few)
•10 g of pine nuts, toasted
•1 hard boiled egg
•1/2 sprig of chives
•6 olives
•half a small tomato, diced
•1 slice of ham or smoked salmon, in rings
•1/2 grilled pepper
•3 tbs of extra virgin olive oil
•1 tbs balsamic vinegar
Himalayan salt and freshly grind pepper

What you do
•scrape and then wash the asparagus
•cut the ends (approx. 6 cm)
•put the asparagus in a pan with plenty of water and bring to a boil
•cook the asparagus for approx. 15 min. till tender
•drain and place on the plate
•cover with the pine nuts, the hard boiled egg, sliced olives, chives, grilled red pepper, ham (or smoked salmon)
•sprinkle with olive oil, balsamic vinegar, salt and pepper to taste


There are Apples and...Apples

It can be tough to pick the right apple for, let's say apple sauce, to bake a pie or to prepare stuffed in the oven. Recipes make it very challenging too because, most of the time, they name a specific type common in some part of the world, but not available at your local store.

That is why when I saw this post in Facebook by Food Inc. I thought I needed to share it. Hopefully it will simplify your cooking life! At least, when it comes to apples...


Crème Caramel (Flan)

Flan is one of the deserts I grew up with and I wouldn't dream of doing without! But Crème Caramel with no milk? Is that possible? You betcha! I recently had Argentine friends Darío and Gustavo over for a few days. They love my cooking but are the toughest food critics I know. So, I decided to have them taste this dairy and sugar free version of our traditional delicacy and see what they said.
They loved it! So now it ready to go on the blog!

What you need (for 12)
•12 oven proof ramekins of approx. 10 cm diameter and 6 cm high
•oven dish big enough to fit 8 ramekins

Ingredients
• 1 l good quality almond (or coconut) milk
(I like to buy Ecomil because it is certified organic, has no added sugar and is one of the few brands that contains just almonds and water)!
•12 + 3 tbs of agave nectar (honey or maple syrup will work too but I prefer agave nectar because it has a lower glycemic index)
1 vanilla pod
•9 whole eggs


What you do
•preheat the oven to 175°C
•put 8 tbs of agave nectar in a pan, heat and boil for approx. 5 min (or till it starts to thicken)
•pour the hot agave nectar into the 12 ramekins and try to cover as much of the inside of the ramekin with it (hold the ramekin and tilt)
•slice the vanilla pod through the middle and together with the almond milk, heat it up in a pan. When it is about to reach the boiling point, remove it from the heat and let it cool down a bit
(stir once in a while making sure the almond milk does not burn on the bottom of the pan)
•meanwhile beat the eggs together with 3 tbs of agave nectar to a cream
•look for the vanilla pod. If you find the seeds are still on the pod, take a sharp knife and scrape them off into the almond milk. Discard the pod.
•while mixing, now ladle the hot almond milk into the egg mixture, little by little
•pour the mixture into 12 ramekins
•place the 12 ramekins in the oven dish and fill the oven dish with water
(the water should cover 3/4 of the ramekins)
•place in the middle of the oven and cook for 50 min
(check the consistency after 40 min with a tooth pick. If the mixture is firm, and your tooth pick comes out dry, it means it is ready)
•once cooled down, you can place the ramekins in the fridge. When you are ready to serve, free the flan from the ramekin by losening the top edge of the flan from the ramekin with a knife. Then place the serving plate on top of the ramekin, turn it upside down and shake. It should release by itself.

Remarks
You notice that while in the oven your ramekin mixtures start to darken a bit too fast at the top. No worries! Just cover the pan with a tin foil tent (making sure the foil does not stick to the ramekin).